
Over 500 Google Reviews!


Dr. Haggerty’s Book

Contact Us
3500 NE Ralph Powell Rd STE D
Lees Summit, MO 64064
P: 816.554.8300
F: 816.554.8303
![]()
![]()
© Lakewood Oral & Maxillofacial Surgery Specialists. All Rights Reserved.
Lakewood OMFS introduces virtual dental implant treatment planning and placement utilizing cone beam CT guided surgery and the i-Tero digital scanner. “The combination of the cone beam CT (CBCT) scanner and the i-Tero digital scanner allows us to obtain more information than traditional 2D films, increases treatment predictability, enables restoration-driven implant treatment planning, allows for the fabrication of custom guides prior to implant placement and allows us to provide our referrals with an articulated model with the implant analog (s) in place” Christopher Haggerty DDS, MD, FACS.
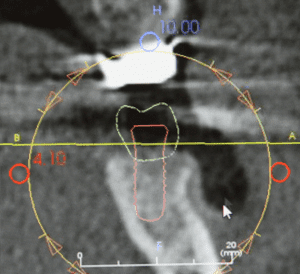
Image 1. Implant treatment planning is performed virtually using restoration guided implant planning (crown-down approaches).
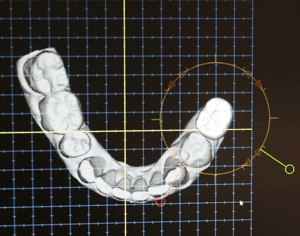
Image 2. A virtual crown is placed within the edentulous area and is modified to anatomically fit the embrasures/contacts, occlude ideally with the opposing dentition and to match adjacent and contralateral dentition.
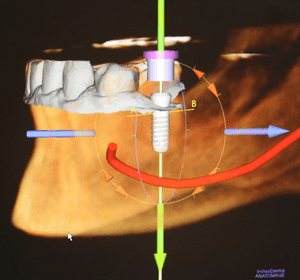
Image 3. Vital structures such as the inferior alveolar nerve are highlighted.
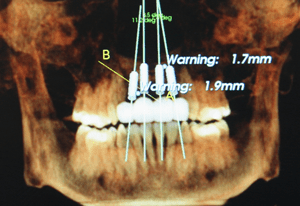
Image 4. Patient presents for implant work-up after traumatically avulsing teeth 7-10. Virtual crowns and implants are placed utilizing implant specific software.
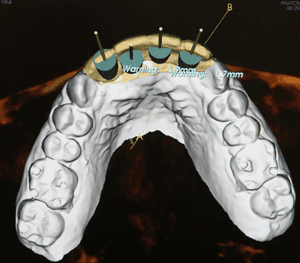
Image 5. Implants are positioned palatal for the fabrication of individual screw-retained crowns.
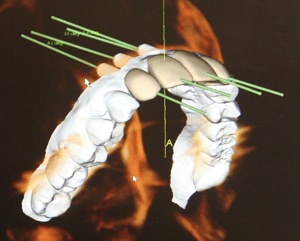
Image 6. Implants are placed as parallel as possible using the crown-down approach.

Image 7. A custom guide is computer generated, virtual drill sleeves are placed and interference’s are removed.
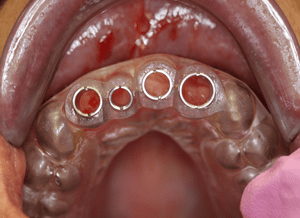
Image 8. A custom guide is fabricated, which articulates with the occlusal third of the clinical crowns of adjacent teeth
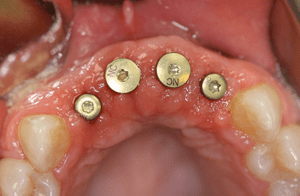
Image 9. Final implant placement.
After implant osseointegration, a new i-Tero digital scan is obtaining using a scan body (Image 10). The scan body allows the i-Tero to take a digital impression of the patient while recording the exact size and location of the dental implant (s), the adjacent/opposing dentition and a bilateral bite registration (Images 11 & 15).
The i-Tero digital scan is then used to:
“At Lakewood OMFS, we strongly believe that better planning leads to more predictable treatment results. The combination of our cone beam CT scanner and i-Tero digital scanner allow us to provide our referring doctors with the tools that they need to ensure predictable and outstanding prosthetic outcomes” Christopher Haggerty DDS, MD, FACS.
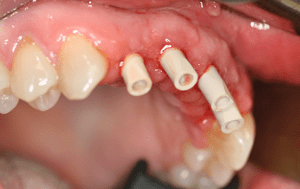
Image 10. Scan bodies are placed in preparation for i-Tero.
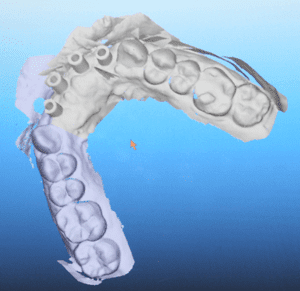
Image 11. i-Tero digital scanning with scan bodies in place. The digital scan is used to create a digital impression of the patient while recording the exact size and location of the dental implants, the adjacent/opposing dentition and a bilateral bite registration.
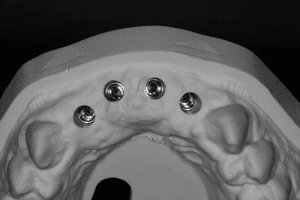
Image 12. Final impression with implant analogs in place. The model is sent to the laboratory for the fabrication of custom abutments and individual screw-retained crowns.
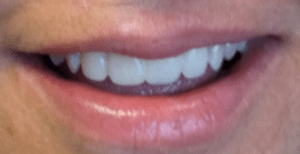
Image 13. Final result using CBCT virtual treatment planning and i-Tero digital scanning.
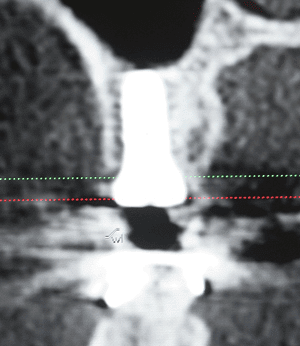
Image 14. Implant #3 is placed using CBCT virtual treatment planning and i-Tero digital scanning. Implant is positioned using restoration guided implant planning (crown-down approach).
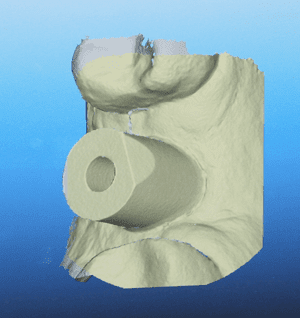
Image 15. I-Tero digital scan demonstrating the position of the scan body and adjacent teeth.
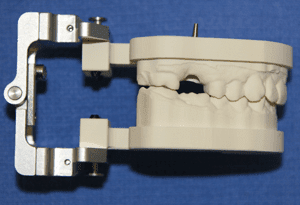
Image 16. Articulated model is delivered to the restoring doctor.
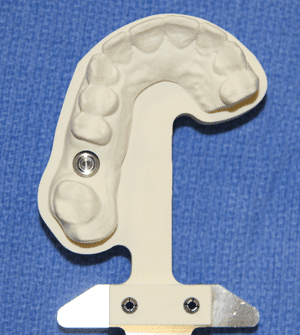
Image 17. Implant analog in place. The articulated model is sent to the restoring doctors preferred dental lab for the fabrication of the final crown. Due to ideal implant placement, a stock abutment will be utilized.
3500 NE Ralph Powell Rd STE D
Lees Summit, MO 64064
P: 816.554.8300
F: 816.554.8303
![]()
![]()
© Lakewood Oral & Maxillofacial Surgery Specialists. All Rights Reserved.